Introduction
A tie is more than just a strip of fabric hanging from your collar. It’s a style statement, a cultural symbol, and often an instant confidence booster. Think of James Bond calmly adjusting his tie before walking into danger, or a groom straightening his Windsor knot moments before saying “I do.” In those moments, the tie isn’t just part of the outfit, it reflects confidence, presence, and attention to detail.
And yet, most people have had that familiar moment like standing in front of the mirror on a rushed morning, tie in hand, wondering, “How do I tie this again?” If that sounds familiar, you’re definitely not alone.
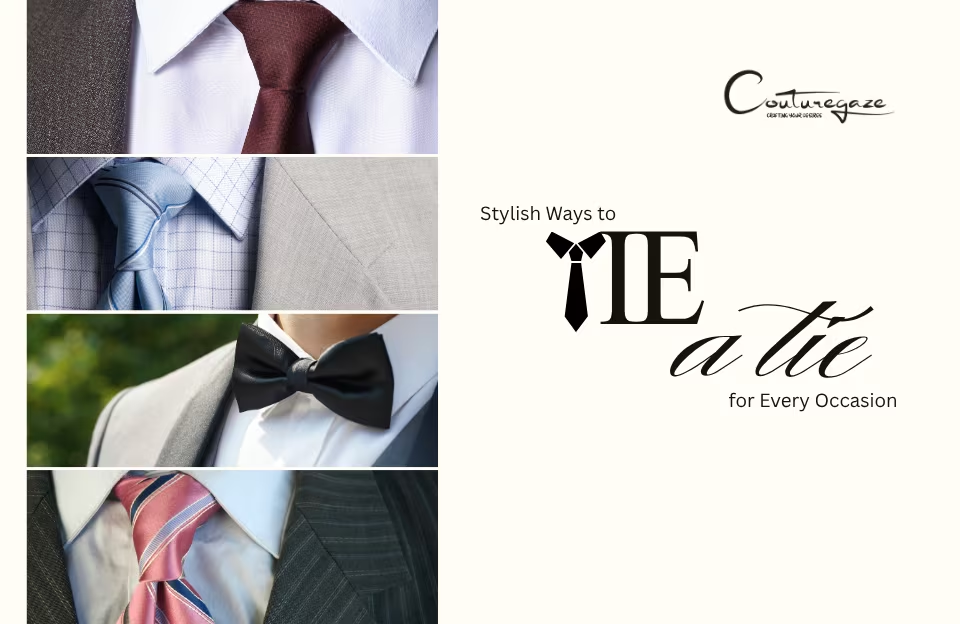
This guide breaks down 10 stylish ways to tie a tie, ranging from beginner-friendly knots to advanced styles that help you stand out at weddings, business meetings, galas, and formal events. Whether you’re dressing for work or a special occasion, the right knot can elevate your entire look.
In this complete guide, you’ll learn:
- Easy, step-by-step tie knot explanations (mirrored for easy practice)
- When and where each knot works best
- Expert styling tips for collars, fabrics, and proportions
- How to choose the right knot for your face shape and outfit
By the end, you won’t just know how to tie a tie, you’ll know how to wear it with confidence.
- Introduction
- Why the Right Tie Knot Matters
- 1. The Four-in-Hand Knot (Best for Beginners)
- 2. The Half Windsor Knot (Balanced & Professional)
- 3. The Full Windsor Knot (Classic, Powerful & Formal)
- 4. The Pratt Knot (Also Known as the Shelby Knot)
- 5. The Eldredge Knot (Bold, Artistic & Eye-Catching)
- 6. The Trinity Knot (Creative, Symbolic & Sophisticated)
- 7. The Bow Tie (Classic, Timeless & Confident)
- 8. The Oriental Knot (Also Known as the Simple Knot)
- 9. The Kelvin Knot
- 10. The Balthus Knot (The Bold Statement)
- Bonus
- Four-in-Hand vs Prince Albert Knot: Which One Should You Choose?
- How to Choose the Right Tie Knot
- Common Tie Mistakes to Avoid
- History of Tie Knots & the Tie in Indian and Global Fashion
- FAQs About Tying a Tie
- Final Thoughts
Why the Right Tie Knot Matters
Many people underestimate the impact of a tie knot. But the truth is, the knot sets the tone for your entire outfit.
A well-chosen knot can:
- Balance your face shape
- Complement your shirt collar
- Match the formality of the occasion
- Instantly make you look more polished and intentional
Wearing the wrong knot, on the other hand, can make even an expensive suit look awkward or unfinished. Understanding a few key knots gives you flexibility and style control.
10 Stylish Ways to Tie a Tie for Every Occasion
1. The Four-in-Hand Knot (Best for Beginners)
The Four-in-Hand knot traces its roots back to 19th-century England. It was popularised by members of the famous Four-in-Hand Club, gentlemen who reportedly tied their scarves with one hand while holding horse reins with the other. That practicality gave the knot its name, and its understated elegance has kept it relevant for more than a century.
If you ever decide to learn just one tie knot, make it the Four-in-Hand. Why? Because it strikes the perfect balance between ease and style. the Four-in-Hand not just as “narrow,” but as “the rugged jeans of tie knots – casual, reliable, and goes with almost anything.
The Four-in-Hand knot is slightly asymmetrical, which gives it a relaxed, natural look rather than a stiff, overly formal appearance. Its narrow shape adds visual interest and works beautifully with most shirt collars. It’s also one of the easiest knots to tie, making it ideal for beginners or busy mornings.
Another advantage is that this knot uses less tie length, which makes it an excellent choice for tall men wearing standard-length ties. The slim profile pairs especially well with button-down collars and shirts with a narrow or moderate spread.
- Best for: Everyday office wear, school uniforms, casual dinners, and semi-formal settings.
- Style notes: Narrow, slightly asymmetrical, relaxed yet polished – a true all-rounder(Effortless & Timeless).
- Pro styling tip: The Four-in-Hand knot looks best with slim or medium-width ties. Pair it with a casual blazer, knitwear, or a school uniform for an effortlessly sharp look.

Step-by-Step guide on how to tie a necktie Four-in-Hand knot:
Step 1: Drape the tie over your neck, begin with the wide end (“W”) of your necktie on the right side, extending about 12 inches lower than the narrow end (“N”) on the left. Cross the wide end over the narrow end.
Step 2: Take the wide end and wrap it fully around the narrow end, bringing it back to the front.
Step 3: Now, pull the wide end up and through the neck loop (the space between your collar and the tie).
Step 4: Using your index finger, hold the front of the knot loosely to create a small loop. Then, guide the wide end down through this front loop.
Step 5: Finally, remove your finger and tighten the knot gently by pulling down on the wide end. Slide the knot upward with care until it rests neatly at the collar.
2. The Half Windsor Knot (Balanced & Professional)
The Half Windsor knot was developed as a streamlined alternative to the Full Windsor, designed for professionals who wanted structure without excess bulk. It gained popularity in mid-20th-century America, where it became a business standard for men who valued both polish and practicality.
This knot forms a clean, symmetrical triangular shape that sits comfortably between casual and formal. It’s larger than the Four-in-Hand, yet less bulky than the Full Windsor, offering a refined, confident look without feeling overpowering. Despite its name, the Half Windsor doesn’t use half the fabric of a Full Windsor; in reality, it uses about 75%, which explains its elegant presence.
Because of its size and thickness, the Half Windsor works best with medium to wide spread collars, allowing the knot to sit neatly without crowding the collar points. It’s an excellent choice for business meetings, interviews, and semi-formal occasions, where you want to look professional but approachable.
Another advantage is its ease of tying. Compared to the Full Windsor, the Half Windsor is quicker and more forgiving, making it a practical option for year-round wear.
- Best for: Job interviews, business meetings, office presentations, and formal work settings.
- Style notes: Medium-sized, symmetrical, structured, and polished.
- Who it suits best: Men with slimmer builds or longer necks, as the horizontal width of the knot helps create a broader, more balanced appearance.
- Pro styling tip: Pair the Half Windsor with medium-width ties and spread collars for a confident, professional look that never feels overdone.

Step-by-Step guide on how to tie a necktie Half Windsor knot:
Step 1: Drape the tie around your neck so the wide end hangs about 12 inches lower than the narrow end. Cross the wide end over the narrow end.
Step 2: Take the wide end and bring it behind the narrow end, creating the first twist of the knot.
Step 3: Now pull the wide end upward through the gap between your collar and the tie. Let it fall back down in front.
Step 4: Wrap the wide end across the front of the narrow end, from left to right.
Step 5: Bring the wide end upward again through the collar gap and let it rest on top.
Step 6: Keep the knot slightly loose for now, this leaves a small loop on top, which you’ll use in the next step.
Step 7: Slip the wide end of the tie down through the loop you just created on top of the knot.
Step 8: Finally, pull the wide end down firmly and adjust the knot so it sits neatly centred between your shirt collar.
That’s it, you’ve mastered the Half Windsor Knot, a perfect balance of style and simplicity!
3. The Full Windsor Knot (Classic, Powerful & Formal)
I remember trying this knot before my first big interview, it took three tries, but that symmetry gave me a massive confidence boost.
Named after the Duke of Windsor, though not actually invented by him. The Full Windsor knot became closely associated with confidence, authority, and prestige. Over time, it earned a reputation as a favourite among diplomats, executives, and world leaders, cementing its place as one of the most iconic tie knots in men’s fashion.
Often referred to as the “granddaddy of all tie knots,” the Full Windsor is widely considered the most elegant and commanding option. It creates a large, perfectly symmetrical triangular knot that immediately draws attention and signals formality. Its size and structure project confidence, making it ideal for moments when appearance truly matters.
Because the Windsor knot is thick and wide, it pairs best with spread or cutaway collars, where it has enough space to sit neatly without looking crowded. This knot is a popular choice for weddings, formal ceremonies, job interviews, high-stakes meetings, and important presentations, anywhere you want to make a strong first impression.
- Best for: Weddings, formal events, presentations, and high-level professional meetings.
- Style notes: Wide, symmetrical, bold, and authoritative, a statement knot with timeless appeal.
- Pro styling tip: The Full Windsor is often called the “CEO knot.” Pair it with a high-quality silk tie, a crisp dress shirt, and a sharp, well-tailored suit to achieve a powerful, polished look.

Step-by-Step guide on how to tie a necktie Full Windsor knot:
Step 1: Place the tie around your neck with the wide end (W) on the right side, hanging about 14 inches lower than the narrow end (N) on the left. Cross the wide end over the narrow end.
Step 2: Take the wide end upward through the gap between your collar and the tie.
Step 3: Bring the wide end back down in front.
Step 4: Now, pull the wide end underneath the narrow end and move it to the right side. At this stage, the back side of the wide end will be visible.
Step 5: Pull the wide end up through the collar gap again, bringing it forward.
Step 6: Let the wide end drop down and wrap it across the front of the narrow end so that the front side of the tie shows again.
Step 7: Bring the wide end upward once more through the collar gap.
Step 8: Now, pass the wide end down through the loop you created in front of the knot.
Step 9: Using both hands, tighten the knot carefully and slide it upward until it rests neatly at the center of your collar.
4. The Pratt Knot (Also Known as the Shelby Knot)
Looking for a tie knot that sits perfectly between the Four-in-Hand and the Half Windsor? That’s where the Pratt knot comes in.
This knot was invented by Jerry Pratt, an American who worked for the U.S. Chamber of Commerce, during the 1980s. For nearly 30 years, Pratt tied his neckties in this distinctive way before television anchor Don Shelby noticed the knot and introduced it to a wider audience on TV in 1989. Since then, the knot has also been known as the Shelby knot, and it helped modernise tie culture with its unique inside-out starting technique.
The Pratt knot creates a clean, symmetrical, medium-sized knot that’s larger than a Four-in-Hand but slightly smaller than a Half Windsor. Its balanced proportions make it one of the most versatile knots you can learn, polished enough for professional settings, yet relaxed enough for social occasions.
This knot pairs best with narrow to medium spread collars, where its shape sits neatly without overwhelming the shirt. It works well for daily office wear, business-casual outfits, evening events, and wedding receptions, though it’s best avoided for ultra-formal, black-tie situations.
- Best for: Business wear, office settings, and occasions requiring balanced formality.
- Style notes: Clean, symmetrical, modern, and refined.
- Pro styling tip: The Pratt knot looks especially good with striped or patterned ties, as its symmetry helps balance bold designs without looking busy.

Step-by-Step guide on how to tie a necktie Pratt knot:
Step 1: Begin with your tie inside out, draped around your neck. Position the wide end (W) on the right, hanging about 12 inches lower than the narrow end (N) on the left. Cross the wide end underneath the narrow end.
Step 2: Now, bring the wide end over the narrow end and then back underneath. Pull the loop down gently and adjust for a neat start.
Step 3: Move the wide end to the right side across your chest.
Step 4: Lift the wide end upward, passing it behind the loop around your collar.
Step 5: Bring the wide end down through the loop in front of the knot, letting it fall neatly.
Step 6: Using both hands, tighten the knot carefully while pinching the sides slightly, this will create the signature dimple at the top of the tie. Slide the knot upward until it rests comfortably at the center of your collar.
5. The Eldredge Knot (Bold, Artistic & Eye-Catching)
Is the Eldredge knot practical? Probably not. Is it a conversation starter? Absolutely.
The Eldredge knot was created by Jeffrey Eldredge in 2007, and it quickly became an internet sensation thanks to its intricate, braid-like appearance. Unlike traditional tie knots that focus on symmetry and simplicity, the Eldredge is designed to stand out, making it a favourite among men who enjoy bold, fashion-forward styling.
If you’re looking for a knot that’s dramatic, unconventional, and guaranteed to draw attention, the Eldredge knot delivers. This knot features four diagonal sections and one horizontal band, all layered over one another to create a complex, sculpted look.
One of the defining characteristics of the Eldredge knot is its asymmetry. The knot naturally leans slightly toward the wearer’s right side, as the right-side sections overlay the left-side diagonals. Because of its size and complexity, it pairs best with wide spread or cutaway collars, which give the knot enough room to sit comfortably.
Another unique aspect of the Eldredge knot is its unorthodox tying method. Instead of using the wide end of the tie, the Eldredge is tied using the narrow end, while the wide end remains mostly hidden. This is what allows the knot to achieve its layered, braided structure.
Due to its bold nature, the Eldredge knot is best reserved for casual to relaxed formal occasions, such as date nights, fashion events, parties, or wedding receptions. It’s not recommended for conservative business settings, formal presentations, or black-tie events, where its complexity can feel out of place.
- Best for: Fashion events, creative gatherings, parties, and statement-making occasions.
- Style notes: Intricate, layered, asymmetrical, and guaranteed to attract compliments.
- Pro styling tip: Always choose a solid-colored tie. Patterns can clash with the knot’s detailed folds and make the design look visually cluttered.

Step-by-Step guide on how to tie a necktie Eldredge knot:
Step 1: Drape the tie around your neck with the wide end on the left and the narrow (small) end on the right. The tip of the wide end should rest at your belt buckle. Throughout this knot, you’ll only be moving the narrow end.
Step 2: Bring the small end over the wide end to the left.
Step 3: Pass the small end under the wide end and to the right.
Step 4: Bring it up through the center towards the neck loop.
Step 5: Feed the small end through the neck loop and out to the left.
Step 6: Move it across the front to the right, then up into the neck loop from underneath.
Step 7: Bring the small end down to the left, then around the back of the wide end to the right. Keep this wrap slightly loose.
Step 8: Pass the small end across the front to the left, then slip it through the loop created in the previous step.
Step 9: Gently pull the small end towards the left to tighten the knot.
Step 10: Lift the small end up to the center, guiding it through the neck loop and down to the left.
Step 11: Repeat by moving the small end up again to the center, through the neck loop, and down to the right. Keep this loop a little loose.
Step 12: Take the small end across the front to the left, and once again pass it through the loop made in the previous step.
Step 13: Tighten carefully by pulling the small end to the left, this locks the layered design into place.
Step 14: Tuck the remaining length of the small end neatly behind the neck loop on the left side.
Step 15: Adjust the folds, center the knot, and admire your masterpiece. The Eldredge Knot’s layered, woven look will make you the most stylish person in the room.
6. The Trinity Knot (Creative, Symbolic & Sophisticated)
Inspired by the ancient Celtic Triquetra symbol, the Trinity knot represents unity, strength, and creativity. While the symbol itself dates back centuries, the tie knot gained modern popularity through social media in the early 2010s, where its intricate design quickly caught the attention of style enthusiasts.
Much like the Eldredge knot, the Trinity knot is complex and visually striking, making it best suited for social or semi-formal occasions rather than conservative business environments. Think date nights, wedding receptions, gala dinners, or creative events where personal style is encouraged.
The Trinity knot features three interwoven sections that meet in the center, forming a beautifully balanced knot with strong triangular proportions. Despite its complexity, the finished knot appears symmetrical and intentional, which gives it a refined, artistic look.
Because the Trinity knot is slightly larger than a Full Windsor, it requires space to shine. It pairs best with spread or cutaway collars, which allow the knot’s structure to sit comfortably without crowding the neckline.
Like the Eldredge knot, the Trinity is tied using the narrow (skinny) end of the tie, while the wide end remains mostly hidden, a technique that enables its distinctive woven appearance.
- Best for: Weddings, gala dinners, creative events, and statement occasions.
- Style notes: Symmetrical, three-way woven design with strong visual impact.
- Pro styling tip: Choose lightweight, thin-fabric ties. Heavy or bulky silk can distort the knot’s symmetry and reduce its clean, geometric appeal.

Step-by-Step guide on how to tie a necktie Trinity knot:
Step 1: Drape the tie around your neck with the narrow end hanging lower than the wide end. The wide end will stay fixed throughout the process, so position it where you want it to rest, ideally at your belt buckle.
Step 2: Take the narrow end and cross it over the wide end. This small end will do all the work in forming the knot.
Step 3: Wrap the narrow end around the portion of the tie sitting against your collar.
Step 4: Pull the narrow end down firmly to secure the wrap, then bring it behind the wide end.
Step 5: Now, loop the narrow end over the tie’s collar portion once more, creating another diagonal layer.
Step 6: Tighten slightly, bringing the narrow end downward again.
Step 7: Pass the narrow end over the wide end of the tie.
Step 8: For a second time, guide the narrow end up through the gap between your collar and the tie, but this time leave the loop slightly loose.
Step 9: Feed the narrow end through the loop you just created at the top of the knot, but do not pull it tight yet.
Step 10: Bring the narrow end behind the wide end, then carefully tuck it through the loop formed in the previous step.
Step 11:
Pull gently on the narrow end to tighten the knot. Because of its layered structure, you may need to adjust each fold to achieve the signature trinity spiral look.
Step 12: Tuck any remaining length of the narrow end under your shirt collar to hide it neatly.
7. The Bow Tie (Classic, Timeless & Confident)
The bow tie traces its origins back to 17th-century Croatian soldiers, whose knotted cravats caught the attention of French aristocrats. Over time, this simple neckwear evolved into a symbol of elegance, intellect, and black-tie sophistication, a reputation it still holds today.
Unlike traditional neckties, a bow tie forms a symmetrical bow shape at the collar. While it’s most famously associated with tuxedos and formal wear, the modern bow tie has become far more versatile. From weddings and formal banquets to creative styling with casual blazers, the bow tie allows wearers to express confidence and individuality.
A properly tied bow tie is usually fastened using a method similar to tying a shoelace, creating a slightly imperfect finish that adds charm and authenticity. While pre-tied versions exist, hand-tied bow ties are widely preferred for their natural, refined look.
- Best for: Black-tie events, proms, weddings, formal dinners, and evening galas.
- Style notes: Classic, playful, confident, and timeless.
- Pro styling tip: A bow tie adds a touch of quirky confidence. Pair it with a tuxedo for traditional elegance, or wear it with a tailored blazer for a modern, fashion-forward twist.

Step-by-Step guide on how to tie a necktie Bow knot:
Step 1: Lay the bow tie face up on a flat surface or around your neck. Adjust it so that the right end (B) is slightly shorter than the left end (A). These two ends will form the base of your bow.
Step 2: Cross end A (left side) over end B (right side) to create the first overlap.
Step 3: Bring end A up through the neck loop from underneath and pull it tight. This will act as the anchor of your bow.
Step 4: At the joint, fold end B (right side) horizontally to form the front bow shape. Hold it firmly at the center.
Step 5: Now, let end A fall straight down over the middle of the bow shape created with end B. This forms the bow’s centerpiece.
Step 6: Fold end A back towards your chest and pinch it tightly to hold its shape.
Step 7: Carefully push the folded end (A) through the small loop that sits behind the folded part of end B. This step creates the back half of the bow.
Step 8: Gently pull on both folded sides of the bow to tighten the knot. Adjust carefully without distorting the shape.
Step 9: Make final adjustments to ensure the bow tie looks even, balanced, and snug at the collar.
8. The Oriental Knot (Also Known as the Simple Knot)
The Oriental knot, often called the Simple knot, is valued for one thing above all else – speed. Predominantly used in parts of Asia, this knot is a minimalist’s go-to option for quick, no-fuss dressing, especially on busy mornings.
If you’re wondering whether it’s possible to tie a knot that’s even simpler than the Four-in-Hand, the answer is yes. The Simple knot lives up to its name. While it isn’t widely worn in Western menswear, it remains a practical choice for those who prioritise efficiency over formality.
The Oriental knot forms a small, slightly asymmetrical knot and uses very little fabric. Unlike most traditional knots, it begins with the wide and narrow ends facing outward, making the tying process quicker and more compact. Because of its minimal size, it works especially well with thick neckties or for taller men who don’t have access to extra-long ties.
This knot is best suited for casual or low-key professional settings, where simplicity and comfort matter more than making a formal statement.
- Best for: Quick office looks, casual outfits, and everyday wear.
- Style notes: Small, minimalist, efficient, and practical.
- Pro styling tip: The Oriental knot is ideal for tall men, as it conserves tie length while still creating a clean, wearable look.

Step-by-Step guide on how to tie a necktie Oriental knot:
Step 1: Begin with the backside of the tie facing away from you. Place the wide end on your right and the small end on your left. The tip of the small end should rest slightly above your belly button (this may vary depending on your height and the length of your tie). Throughout the process, only move the wide end, the small end stays still.
Step 2: Take the wide end and bring it under the small end to the left.
Step 3: Now, wrap the wide end across the front of the small end, moving it to the right.
Step 4: Bring the wide end up through the neck loop from underneath.
Step 5: Pass the wide end down through the loop you just created in the front.
Step 6: Hold the small end steady and gently pull down on the wide end to tighten the knot. Then, slide the knot upward until it sits comfortably and symmetrically at your collar.
9. The Kelvin Knot
Named after the renowned physicist Lord Kelvin, the Kelvin knot is a close relative of the Four-in-Hand but with a sharper, more structured finish. It builds upon the simplicity of the Oriental knot while adding an extra wrap, resulting in a knot that feels more angular and substantial without becoming bulky.
If you like the Four-in-Hand but want something that looks cleaner and more intentional, the Kelvin knot is an excellent upgrade. Unlike most traditional knots, it begins with the tie inside out, creating an inverted tail that gives the knot its distinctive shape and symmetry.
Visually, the Kelvin knot sits between casual and refined. It maintains a slim profile, making it ideal for modern tailoring, especially slim-fit suits and narrow lapels. Because of its modest size, it pairs best with narrow or medium spread collars and works particularly well in relaxed social settings rather than highly formal environments.
This knot is perfect for men who want something slightly different, subtle enough for everyday wear, yet unique enough to stand out.
- Best for: Modern slim-fit outfits, narrow collars, date nights, and evening outings.
- Style notes: Sleek, slim, structured, and contemporary.
- Pro styling tip: The Kelvin knot shines with wool or knit ties, adding texture and visual depth to casual or smart-casual looks.

Step-by-Step guide on how to tie a necktie Kelvin knot:
Step 1: Drape the tie around your neck with the back side (stitching) facing outward. Let the wide end hang about 12 inches lower than the narrow end. Cross the narrow end over the wide end.
Step 2: Bring the wide end across the narrow end and pull it slightly tight to form the first wrap.
Step 3: Make a second wrap by taking the wide end around the narrow end once more.
Step 4: Now, guide the wide end up through the gap between your collar and the tie.
Step 5: Carefully pull the wide end down through the loop created by the second wrap.
Step 6: Tighten the knot by pulling the wide end down and sliding the knot up until it sits neatly at the center of your collar.
10. The Balthus Knot (The Bold Statement)
Created by Count Balthasar Klossowski, better known as Balthus, this knot was designed to challenge traditional proportions and embrace dramatic elegance. A surrealist artist by trade, Balthus approached fashion the same way he approached art, boldly, unconventionally, and without concern for restraint.
If the Full Windsor is considered the “granddaddy” of tie knots, then the Balthus Knot is its larger-than-life successor. By adding extra wraps of the wide end around the narrow end, this knot produces an exceptionally thick, broad, conical shape that instantly commands attention.
Because of its size, the Balthus knot is not an everyday option. It is deliberately over-the-top, making it ideal for men who want to make a confident style statement at high-end or artistic events. This knot requires a wide spread or cutaway collar to balance its volume, and it pairs best with plain shirts that allow the knot to take center stage.
One important consideration: while slimmer men often benefit from larger knots like the Windsor, the Balthus can appear out of proportion on very lean frames. It works best on men with an average or broader build, where the knot enhances structure rather than overwhelming it.
Interestingly, despite inventing it, Balthus himself reportedly rarely wore the knot, a reminder that true statement pieces don’t need to be worn often to leave a lasting impression.
- Best for: Fine dining events, theatre evenings, artistic gatherings, statement fashion moments.
- Style notes: Oversized, bold, rare, unapologetically dramatic.
- Pro styling tip: Pair with wide spread collars, solid-coloured shirts, and high-quality silk ties. Avoid patterns, let the knot do the talking.

Step-by-Step guide on how to tie a necktie Balthus knot:
Step 1: Start with the backside of your tie facing forward. Place the wide end on the right and the narrow end on the left.
Step 2: Move the wide end under the narrow end to the left.
Step 3: Bring the wide end up to the center, towards the neck loop.
Step 4: Pass the wide end through the neck loop and let it fall down to the right.
Step 5: Again, bring the wide end up to the center, towards the neck loop.
Step 6: Pull it through the neck loop and let it drop to the left.
Step 7: For a third time, guide the wide end up to the center, towards the neck loop.
Step 8: Pass it through the neck loop once again, letting it fall to the right.
Step 9: Now take the wide end and move it across the front of the narrow end to the left.
Step 10: Lift the wide end up into the neck loop from underneath.
Step 11: Bring the wide end down through the front loop you’ve just created.
Step 12: Finally, pull the wide end down to tighten the knot, and slide it up until it sits neatly at your collar.
Bonus
11. The Prince Albert Knot
Named after Prince Albert, husband of Queen Victoria, this knot is a refined variation of the classic Four-in-Hand — and unlike many knots, it was genuinely worn by its namesake. The Prince Albert knot adds an extra wrap, creating a slightly fuller and more textured look while retaining an effortless, relaxed charm.
Visually, the Prince Albert knot is slightly asymmetrical, much like the Four-in-Hand, but with noticeably more bulk and depth. The defining feature of this knot is the double wrap, where the wide end crosses the narrow end twice. When tied correctly, the first wrap subtly peeks out beneath the second, giving the knot a layered, intentional appearance.
This knot strikes an excellent balance between casual and polished, making it ideal for social occasions, date nights, or evening outings. Its medium size works best with narrow or medium spread collars, especially on modern or slim-cut shirts.
If you enjoy the Four-in-Hand but want something that looks a bit more elevated, without venturing into full Windsor territory – the Prince Albert is a smart upgrade.
- Best for: Date nights, evening outings, smart-casual social events.
- Style notes: Relaxed, layered, slightly asymmetrical, quietly stylish.
- Pro styling tip: The Prince Albert knot looks especially good with slim or textured ties. Pair it with a tailored blazer or open-neck jacket for an effortlessly polished look.

Step-by-Step guide on how to tie a necktie Prince Albert knot:
Step 1: Place the tie around your neck with the wide end on your left and the narrow end on your right. The narrow end should hang just above your belly button (adjust based on your height and tie length).
Step 2: Cross the wide end over the narrow end, moving it toward the right.
Step 3: Bring the wide end under the narrow end, moving it back toward the left.
Step 4: Cross the wide end over the narrow end again, moving to the right.
Step 5: Bring the wide end under the narrow end once more, moving back to the left.
Step 6: Cross the wide end over the narrow end for the final time, moving to the right.
Step 7: Bring the wide end up through the neck loop from underneath.
Step 8: Pull the wide end down through both loops at the front of the knot.
Step 9: Tighten the knot by gently pulling down on the wide end. Slide the knot up toward your collar and adjust until it sits neatly. The first loop should slightly peek out beneath the second, creating the signature layered look.
Four-in-Hand vs Prince Albert Knot: Which One Should You Choose?
| Feature | Four-in-Hand Knot | Prince Albert Knot |
| Knot Size | Small to medium | Medium |
| Symmetry | Asymmetrical | Slightly asymmetrical |
| Difficulty | Very easy (beginner-friendly) | Easy (one extra wrap) |
| Tie Length Used | Uses less tie length | Uses slightly more than Four-in-Hand |
| Visual Style | Slim, relaxed, effortless | Layered, refined, more structured |
| Best Collar Type | Button-down, narrow spread | Narrow or medium spread |
| Best For | Everyday office wear, school, casual looks | Date nights, social events, evenings out |
| Personality Vibe | Understated and classic | Confident, stylish, subtly bold |
| Who It Suits Best | Tall men, slim ties, minimalists | Men who want a polished upgrade without bulk |
Quick Style Verdict
- Choose the Four-in-Hand if you want a fast, foolproof knot that works with almost any outfit.
- Choose the Prince Albert if you like the Four-in-Hand but want a more refined, layered look that stands out without being flashy.
Pro Tip: If your tie feels too long with a Four-in-Hand, the Prince Albert is a great solution, the extra wrap shortens the tie slightly while adding visual depth.
How to Choose the Right Tie Knot
When selecting a tie knot, consider:
- Collar type: Wider collars need bigger knots
- Tie fabric: Thick fabrics create larger knots
- Occasion: Formal events demand structure
- Body type: Larger frames balance better with fuller knots
Matching these elements ensures your outfit looks intentional and polished.
Common Tie Mistakes to Avoid
- Knot too loose or uneven
- Tie length too short or too long
- Overcomplicated knots for formal business settings
- Pairing busy knots with patterned shirts
History of Tie Knots & the Tie in Indian and Global Fashion
A Brief History of the Tie
A tie may look like a simple strip of fabric, but its journey spans centuries, continents, and cultures. From battlefields to boardrooms and runways, the tie and the knot that holds it together has evolved into one of the most powerful symbols of personal style.
Let’s take a closer look at how the tie became what it is today.
A Brief History of the Tie
17th Century: The Croat Origins
The story of the modern tie begins during the Thirty Years’ War in 17th-century Europe. Croatian mercenaries wore knotted neckerchiefs as part of their uniform. French soldiers admired the look and adopted it, naming it “cravat”, derived from Croat.
This simple military accessory quickly caught the attention of French aristocracy — and fashion history was set in motion.
18th–19th Century: The Gentleman’s Era
As fashion grew more refined, cravats evolved into carefully styled neckwear. During the Victorian era, tie-tying became almost a daily ritual of elegance.
British style icon Beau Brummell revolutionized men’s fashion by introducing cleaner silhouettes and structured knots. His influence laid the foundation for the modern necktie, shifting men’s style toward minimalism, precision, and polish.
20th Century: The Rise of Modern Business Wear
With the industrial revolution and corporate culture taking hold, the tie became a global symbol of professionalism. Classic knots like the Four-in-Hand and Windsor dominated office spaces, political stages, and formal events.
A tie was no longer optional, it represented authority, discipline, and respectability.
21st Century: A Global Fashion Statement
Today, the tie has broken free from rigid dress codes. It appears everywhere from runways and streetwear to women’s fashion and casual chic outfits.
No longer limited to gender or profession, the tie has become a creative expression, proving that classic accessories can continuously reinvent themselves.
The Tie in Indian Fashion
India’s relationship with the tie reflects its ability to blend global influence with local identity.
Colonial Influence
During the British Raj, ties were adopted by Indian administrators, lawyers, teachers, and academics. Wearing a tie became a symbol of education, authority, and professionalism.
Corporate India
By the late 20th century, ties became standard attire in banks, multinational companies, and schools, particularly as part of formal uniforms. Even today, the tie remains an essential element in traditional corporate dress codes.
Indian Weddings & Indo-Western Style
Modern Indian weddings have embraced the tie in new ways. Grooms often pair ties or bow ties with sherwanis, bandhgalas, and Indo-Western suits, creating a fusion of tradition and global elegance.
The Bollywood Effect
Cinema has played a major role in redefining tie fashion in India. From Amitabh Bachchan’s authoritative looks in the 1970s to Ranveer Singh’s bold, experimental styling today, Bollywood continues to influence how younger generations perceive ties — not just as formal wear, but as a statement piece.
The Tie in Global Fashion
Different regions interpret the tie through their own cultural lens:
Europe
Europe remains the stronghold of classic tailoring. The Windsor knot, luxury silk ties, and heritage brands like Hermès and Gucci continue to define the tie as a symbol of power and refinement.
United States
American tie fashion has evolved through rebellion and reinvention:
- Skinny ties in the 1960s
- Loud patterns in the 1980s
- Today’s smart-casual and minimalist styling
The tie here reflects individuality as much as professionalism.
Japan
In Japan, ties are deeply ingrained in corporate culture. At the same time, Japanese designers have reimagined ties within avant-garde streetwear, blending tradition with bold creativity.
Middle East & Africa
While traditional attire dominates, ties are commonly worn in corporate, diplomatic, and political settings, often featuring vivid colors and bold knots that reflect regional aesthetics.
Pro Styling Reflection
The tie’s journey from battlefield cravats to red-carpet fashion, proves one thing: A tie knot is never just fabric.
It’s a symbol of power, creativity, culture, and identity. Whether you’re tying a Windsor in London, a bow tie in Mumbai, or a Trinity knot in Tokyo, you’re participating in a global tradition that continues to evolve with every generation.
Fun Fact: The Guinness World Record Tie
Did you know? The largest tie ever tied measured 808 feet (247 meters) long in Croatia in 2003, a tribute to the birthplace of the tie.
FAQs About Tying a Tie
Q1: How many tie knots are there?
There are over 85 documented tie knot variations, ranging from classic everyday styles to highly decorative knots. However, mastering just 8–10 core knots is more than enough to cover every occasion, from job interviews to weddings and formal events.
Q2: How to tie a tie in under 10 seconds?
If speed is your priority, choose the Four-in-Hand or Oriental (Simple) Knot. Both are fast, intuitive, and require minimal steps, perfect for rushed mornings or travel.
Q3: What tie knot is best for weddings?
- Grooms & formal ceremonies: Full Windsor for a polished, authoritative look
- Fashion-forward guests: Trinity or Eldredge for bold, statement styling
- Minimal, elegant weddings: Half Windsor strikes the perfect balance
Q4: Do women wear ties?
Absolutely. Ties have become a modern unisex fashion statement. Women often style ties with oversized blazers, streetwear outfits, waistcoats, or bow ties for a playful yet powerful look.
Q5: Which knot uses the least fabric?
The Oriental Knot uses the least amount of tie length, making it ideal if your tie feels short or if you’re taller and using a standard-length tie.
Q6: Which tie knot is best for interviews?
The Half Windsor is the safest and most professional choice. It’s symmetrical, confident, and polished without being overpowering. For conservative industries, the Full Windsor also works well.
Q7: What tie knot works best with spread collars?
- Wide or cutaway collars: Full Windsor, Balthus, Trinity
- Medium spread collars: Half Windsor, Pratt
- Narrow collars or button-downs: Four-in-Hand, Kelvin, Prince Albert
Q8: Which tie knot uses the least tie length?
Again, the Oriental (Simple) Knot uses the least fabric, followed closely by the Four-in-Hand, both excellent options for conserving tie length.
Final Thoughts
Learning different ways to tie a tie isn’t about showing off, it’s about versatility, confidence, and personal style. When you know which knot to use and when, dressing well becomes effortless.
Mastering the art of tying a tie means mastering the art of self-expression. Each knot, from the humble Four-in-Hand to the regal Windsor and the flamboyant Eldredge, gives you a new way to present yourself to the world.
Start by mastering one or two classic knots, then gradually experiment with advanced styles for special occasions. Over time, tying a tie will feel less like a chore and more like a finishing touch that completes your look.
So next time you ask, “Which tie knot should I wear?”, remember: the knot you choose is a reflection of the moment, the mood, and the message you want to send.
Choosing the right tie width also depends on body proportions. Check your body balance using our Ideal Weight Calculator and BMI Calculators.
If you found this guide helpful, share it with someone who still struggles with their tie on busy mornings.